Disneyland Peanut Butter Sandwich Bars
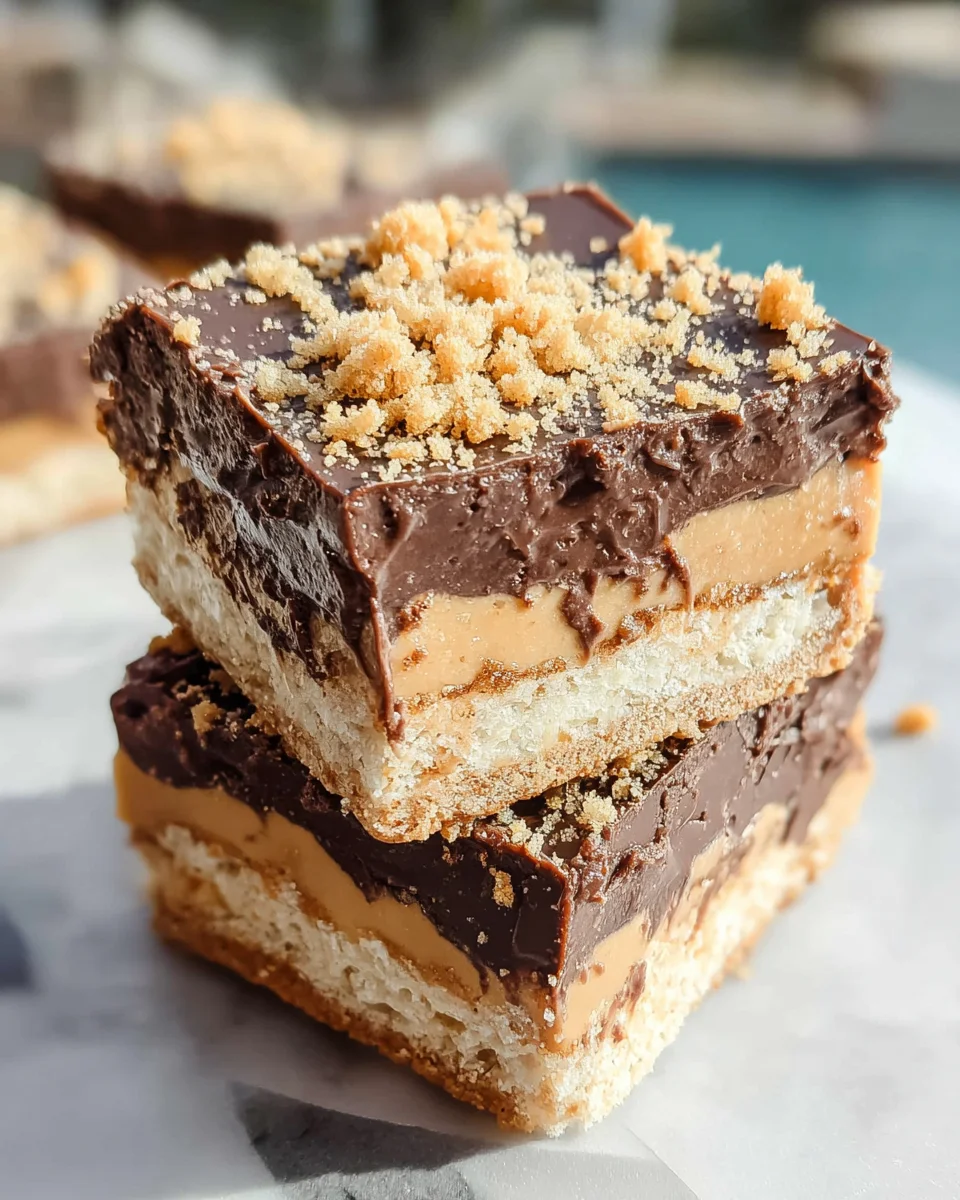
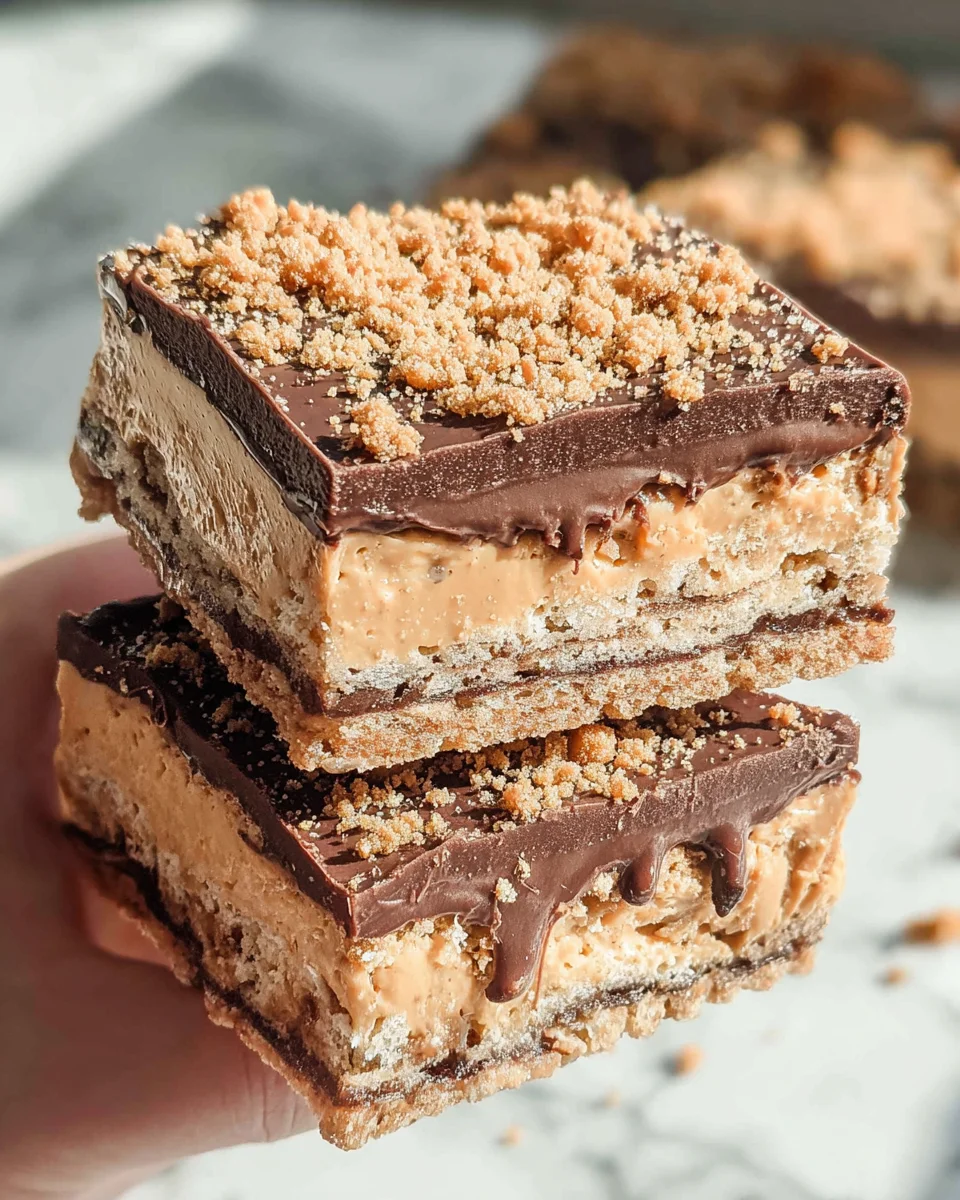
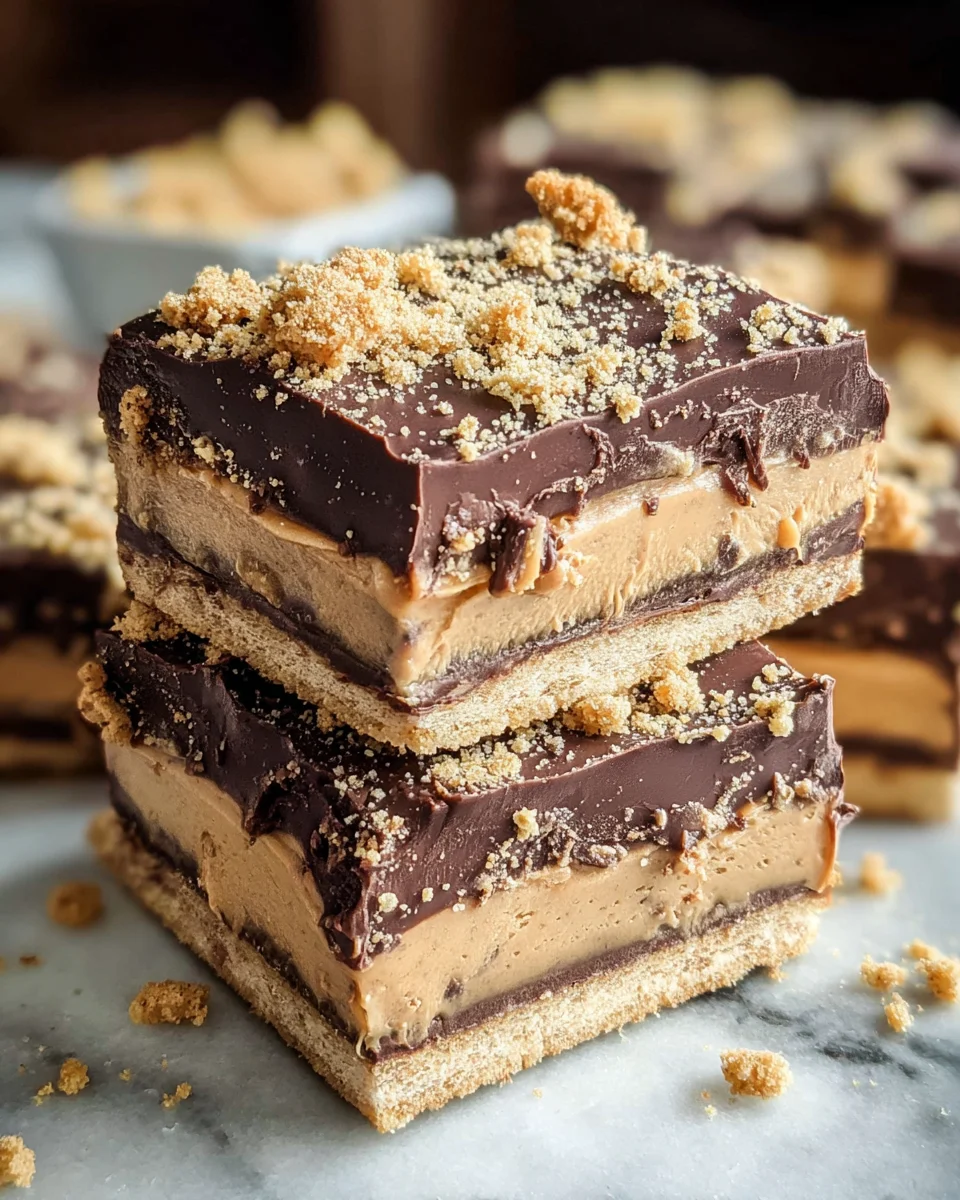
This copycat recipe for Disneyland’s Peanut Butter Sandwich Bars is a delicious no-bake dessert that lets you recreate your favorite Disney snack right from home! Perfect for parties, family gatherings, or just as a sweet treat to enjoy, these bars combine creamy peanut butter and rich chocolate for a flavor explosion. Plus, they’re easy to make and require minimal effort!
Why You’ll Love This Recipe
- Quick to Prepare: With just 10 minutes of prep time, you can whip up this delightful dessert with ease.
- No Baking Required: Enjoy the convenience of a no-bake dessert that saves you time and hassle.
- Perfect for Any Occasion: Ideal for parties, picnics, or simply satisfying your sweet tooth at home.
- Rich and Flavorful: The combination of creamy peanut butter and semi-sweet chocolate creates an indulgent treat that everyone will love.
- Customizable Sizes: Cut the bars into big or small squares to suit any gathering or occasion.
Tools and Preparation
To make these Disneyland Peanut Butter Sandwich Bars, you’ll need a few essential tools in your kitchen. Having the right tools ensures your dessert turns out perfectly every time.
Grab This Chef Knife Now - Almost Gone!
- Stays Razor-Sharp: Ice-hardened blade keeps its edge longer than ordinary knives
- Superior Grip Control: Unique finger hole design gives you perfect balance and safety
- Built to Last a Lifetime: Premium stainless steel blade with elegant beech wood handle
Customer Reviews ★★★★★
Essential Tools and Equipment
- Non-stick spray
- 2-quart glass baking dish (8 ½ x 11)
- Rolling pin or meat mallet
- Microwave-safe bowl
- Mixing bowl
Importance of Each Tool
- Non-stick spray: Prevents the bars from sticking to the dish, ensuring easy removal.
- Mixing bowl: A must-have for combining ingredients smoothly without mess.
Ingredients
This copycat recipe for Disneyland’s Peanut Butter Sandwich Bars is a delicious no bake dessert that lets you make your favorite Disney snack right from home!
For the Base
- 14 whole graham cracker sheets (used in 8 ½ x 11 glass dish)
For the Filling
- 2 cups creamy peanut butter
- 8 tbsp softened butter
- 2 tsp vanilla
- ½ tsp salt
- 3½ cups powdered sugar
For the Topping
- 4 tbsp shortening
- 4 cups semi-sweet chocolate chips
How to Make Disneyland Peanut Butter Sandwich Bars
Step 1: Prepare Your Dish
- Spray a 2-quart (8 ½ x 11) glass baking dish with non-stick spray to ensure easy removal of the bars later.
Step 2: Crush Graham Crackers
- Place 2 whole sheets of graham crackers in a zip bag.
- Crush them into crumbs using a rolling pin, meat mallet, or the bottom of a glass. Set aside for later use.
Step 3: Make the Peanut Butter Mixture
- In a mixing bowl, combine creamy peanut butter, softened butter, vanilla, and salt. Mix until smooth.
- Slowly add in powdered sugar, mixing it in little by little until fully incorporated.
Step 4: Melt the Chocolate
- In a microwave-safe bowl, combine semi-sweet chocolate chips with shortening.
- Heat in the microwave for 30 seconds at a time, stirring between each interval until smooth. Be careful not to overcook.
Step 5: Layer the Graham Crackers
- Lay the first layer of graham crackers (6 whole sheets) flat in the sprayed baking dish.
Step 6: Add Chocolate Layer
- Pour about one-third of the melted chocolate over the graham crackers, spreading it into an even layer.
Step 7: Spread Peanut Butter Mixture
- Take fistfuls of the peanut butter mixture and flatten them with your hands.
- Lay it on top of the chocolate layer while covering as much area as possible without breaking the graham crackers below.
Step 8: Repeat Layers
- Add another third of melted chocolate on top of the peanut butter layer.
- Place another layer of graham crackers (6 whole sheets) on top before pouring remaining chocolate over it.
Step 9: Finish with Crushed Graham Crackers
- Sprinkle crushed graham cracker crumbs on top for added texture and flavor.
Step 10: Chill and Serve
- Let it cool in the refrigerator for at least one hour before cutting into squares—big or small based on your preference!
How to Serve Disneyland Peanut Butter Sandwich Bars
These delightful Disneyland Peanut Butter Sandwich Bars make an excellent treat for any occasion. Whether you’re hosting a party or just indulging yourself, here are some creative ways to serve them.
Family Movie Night
- Pair these bars with your favorite family-friendly films for a cozy night in.
- Serve alongside popcorn for a fun snack mix.
Birthday Parties
- Cut the bars into fun shapes using cookie cutters for a festive touch.
- Offer them as part of a dessert table alongside other sweets.
Potluck Gatherings
- Bring these bars to potlucks; they are always a hit among guests.
- Cut into smaller squares for easy sharing.
Afternoon Tea
- Serve with a cup of tea or coffee for a delightful afternoon treat.
- Add fresh fruit on the side for a refreshing balance.
School Events
- Pack these bars as treats in lunchboxes or at bake sales.
- They are easy to transport and loved by kids.
Holiday Celebrations
- Create themed presentations by adding holiday sprinkles on top.
- Perfect for giving as gifts when wrapped in decorative packaging.
How to Perfect Disneyland Peanut Butter Sandwich Bars
Achieving the best results with your Disneyland Peanut Butter Sandwich Bars is simple with a few handy tips.
- Use fresh ingredients: Ensure your peanut butter and butter are fresh for the best flavor.
- Don’t overheat chocolate: Heat chocolate chips slowly to avoid burning; stir regularly.
- Chill adequately: Allow enough time in the refrigerator for the layers to set properly before cutting.
- Experiment with toppings: Try adding crushed nuts or drizzled caramel on top for extra flair.
- Make ahead: These bars can be made in advance, saving you time when entertaining guests.
Best Side Dishes for Disneyland Peanut Butter Sandwich Bars
To complement your Disneyland Peanut Butter Sandwich Bars, consider serving these tasty side dishes. They bring variety and excitement to your dessert spread.
- Fresh Fruit Salad: A mix of seasonal fruits adds freshness and balances the richness of the bars.
- Vanilla Ice Cream: Creamy ice cream pairs perfectly, enhancing the peanut butter flavor.
- Chocolate Dipped Pretzels: The salty-sweet combination makes an exciting contrast to the sweetness of the bars.
- Mini Cheesecakes: Individual cheesecakes provide a creamy texture that complements the crunchy bars.
- Fruit Smoothies: Refreshing smoothies add a nutritious element and are easy to customize with different flavors.
- Brownie Bites: For chocolate lovers, mini brownies offer another layer of indulgence next to peanut butter treats.
Common Mistakes to Avoid
Making Disneyland Peanut Butter Sandwich Bars can be a fun and rewarding experience. However, there are a few common mistakes that can affect the outcome of your dessert.
- Using the wrong type of peanut butter: Always opt for creamy peanut butter for a smooth texture. Natural peanut butters can separate and make mixing difficult.
- Overheating the chocolate: When melting chocolate, do it in short intervals and stir frequently. Overheated chocolate can seize up and ruin your layers.
- Not preparing the dish properly: Ensure you spray the baking dish with non-stick spray. This will help prevent sticking and make cutting easier later on.
- Skipping refrigeration time: Allowing the bars to cool in the refrigerator is crucial. Without this step, they may not hold their shape when cut.
- Not measuring ingredients accurately: Precision is key in baking. Use proper measuring techniques to ensure you have the right amounts of each ingredient.
Storage & Reheating Instructions
Refrigerator Storage
- Store leftovers in an airtight container for up to 5 days.
- Place parchment paper between layers for easy removal.
Freezing Disneyland Peanut Butter Sandwich Bars
- Wrap bars tightly in plastic wrap or foil before placing them in a freezer-safe container.
- They can be frozen for up to 3 months.
Reheating Disneyland Peanut Butter Sandwich Bars
- Oven: Preheat to 350°F (175°C). Place bars on a baking sheet and heat for about 10 minutes.
- Microwave: Heat a single serving on low power for 15-20 seconds until warm.
- Stovetop: Use a skillet over low heat, cover with a lid, and warm for about 5 minutes.
Frequently Asked Questions
If you’re curious about making Disneyland Peanut Butter Sandwich Bars, here are some commonly asked questions.
Can I use crunchy peanut butter instead?
You can use crunchy peanut butter if you prefer some texture. Just keep in mind it may alter the consistency slightly.
What if I don’t have graham crackers?
You can substitute graham crackers with crushed digestive biscuits or vanilla wafers for a different flavor profile.
How do I make these bars vegan?
To make vegan Disneyland Peanut Butter Sandwich Bars, use plant-based butter and ensure your chocolate chips are dairy-free.
Can I add toppings to my bars?
Absolutely! Feel free to sprinkle chopped nuts, mini marshmallows, or drizzled caramel on top for added flavor and texture.
Final Thoughts
These Disneyland Peanut Butter Sandwich Bars are not only delicious but also incredibly versatile. You can easily customize them by adding your favorite toppings or using different types of nut butter. Whether you want a sweet treat for movie night or a fun dessert for family gatherings, this recipe has got you covered. Give it a try and indulge in this delightful no-bake treat!
Disneyland Peanut Butter Sandwich Bars
- Total Time: 0 hours
- Yield: Approximately 24 servings 1x
Description
Indulge in the magic of Disneyland with these delightful Peanut Butter Sandwich Bars. This easy no-bake recipe allows you to recreate a beloved Disney treat right from your kitchen. With layers of creamy peanut butter and rich semi-sweet chocolate, these bars are perfect for any occasion—be it family gatherings, parties, or simply satisfying a sweet craving.
Ingredients
- 14 whole graham cracker sheets
- 2 cups creamy peanut butter
- 8 tbsp softened butter
- 2 tsp vanilla extract
- ½ tsp salt
- 3½ cups powdered sugar
- 4 tbsp shortening
- 4 cups semi-sweet chocolate chips
Instructions
- Spray a 2-quart glass baking dish with non-stick spray.
- Crush 2 sheets of graham crackers in a zip bag and set aside.
- In a mixing bowl, combine peanut butter, softened butter, vanilla, and salt until smooth. Gradually mix in powdered sugar.
- Melt chocolate chips and shortening in a microwave-safe bowl until smooth.
- Layer half the graham crackers in the dish, pour one-third of the melted chocolate on top.
- Spread half of the peanut butter mixture over the chocolate layer.
- Repeat with remaining ingredients, finishing with chocolate on top and crushed graham cracker crumbs.
- Chill in the refrigerator for at least 1 hour before cutting into squares.
- Prep Time: 10 minutes
- Cook Time: None
- Category: Dessert
- Method: No-Bake
- Cuisine: American
Nutrition
- Serving Size: 1 square
- Calories: 210
- Sugar: 18g
- Sodium: 150mg
- Fat: 12g
- Saturated Fat: 5g
- Unsaturated Fat: 7g
- Trans Fat: 0g
- Carbohydrates: 25g
- Fiber: 1g
- Protein: 4g
- Cholesterol: 15mg

